A Beginner's Guide to LED Resistor Calculation
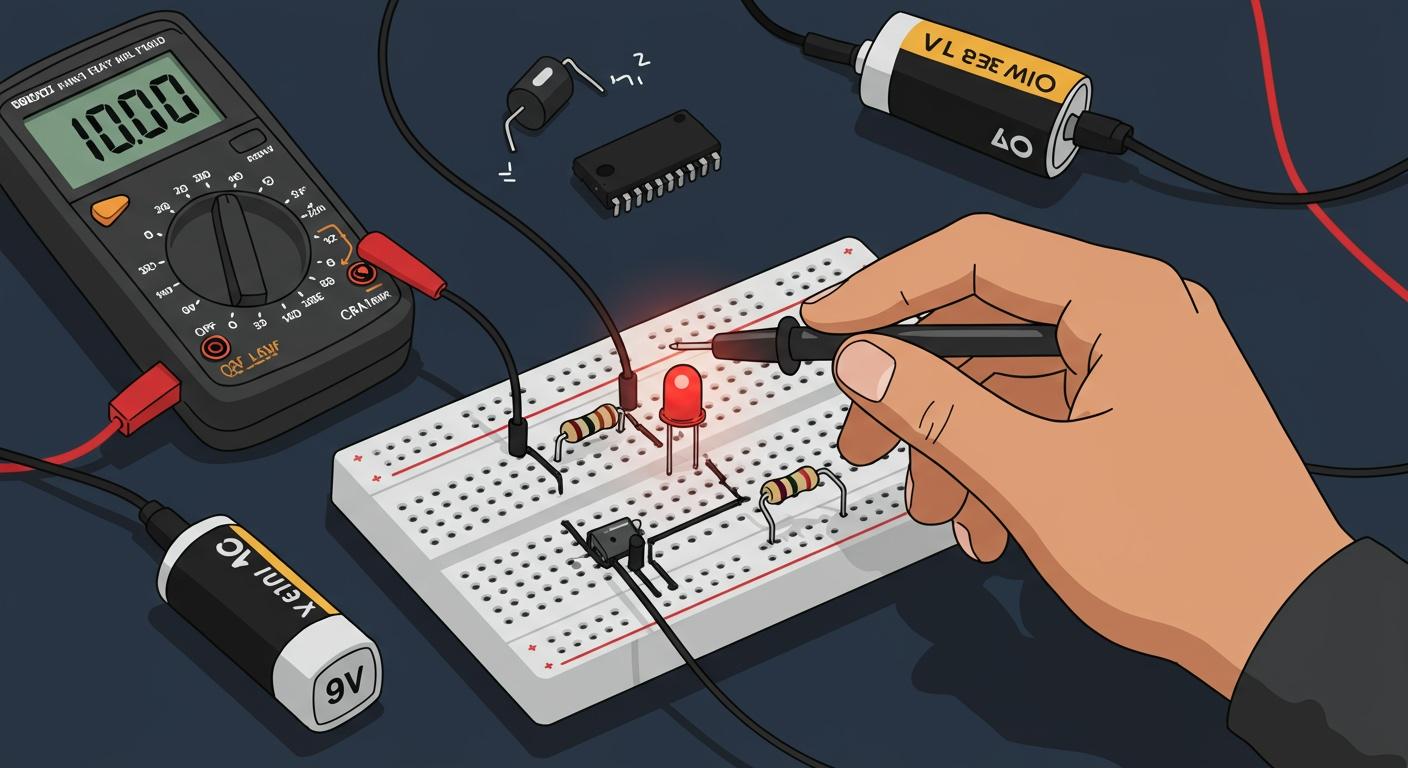
You can calculate the correct resistor value for your LED with one simple formula.
Resistor (R) = (Source Voltage - LED Forward Voltage) / LED Forward Current
You just need three key pieces of information:
- Source Voltage (Vs): Your power supply's voltage.
- LED Forward Voltage (Vf): The voltage your specific LED requires.
- LED Forward Current (If): The ideal current for your LED.
This formula helps you understand what does a resistor do. The resistor limits the current, protecting your LED from too much voltage. Using it ensures your project works safely.
Key Takeaways
- A resistor protects an LED by limiting the electrical current. Without a resistor, an LED can burn out quickly.
- You need three values to calculate the correct resistor: source voltage, LED forward voltage, and LED forward current.
- Use the formula: Resistor (R) = (Source Voltage - LED Forward Voltage) / LED Forward Current.
- Always choose the next highest standard resistor value. This protects your LED and makes it last longer.
- Check the power rating of your resistor. It must be able to handle the heat it creates.
WHAT DOES A RESISTOR DO FOR AN LED?

You might wonder what does a resistor do in a circuit. Its main job is to protect your components. Think of a resistor as a gatekeeper for electricity. It controls the flow of electrical current to make sure your LED gets just the right amount of power.
THE ROLE OF CURRENT LIMITING
An LED is a type of semiconductor diode. It allows current to flow in only one direction. Once you apply enough voltage, the LED will try to draw as much current as your power supply can give. This is a big problem. Without a resistor, the LED will pull far too much power, causing it to burn out very quickly. Even brief power surges can damage the sensitive parts inside an LED.
A resistor prevents this by limiting the current. Here is what does a resistor do to protect the LED:
- It reduces the flow of electrons in the led circuit.
- It takes the extra electrical energy that would harm the LED.
- It safely converts this extra energy into a small amount of heat.
Connecting an LED without a resistor is a common mistake that can shorten its life or destroy it instantly. The brightness of an LED is also directly tied to the current it receives. By using the correct resistor, you provide the ideal current for both safety and good brightness.
INTRODUCING OHM'S LAW
So, what does a resistor do based on a scientific rule? Its behavior is defined by Ohm's Law. This fundamental law of electronics describes the relationship between voltage, current, and resistance. It gives you the power to calculate exactly what you need.
Ohm's Law states that the current through a conductor is directly proportional to the voltage across it. The formula is simple:
Voltage = Current x Resistance or
V = I * R
For our goal, we need to find the resistance. We can easily rearrange the formula to solve for the resistor value (R):
Resistance = Voltage / Current or
R = V / I
This is the core principle behind the formula we shared at the very beginning. It is the key to matching the right resistor to your specific LED and power source.
HOW TO CALCULATE THE RESISTOR VALUE
Now you are ready to gather the three numbers for our formula. Finding these values is the most important step to correctly calculate the resistor value for your project. Let's break down how to find each one.
FINDING YOUR SOURCE VOLTAGE (VS)
Your source voltage (Vs) is the easiest value to find. It is the amount of electrical pressure your power supply provides. You can find this value printed directly on the component itself.
Common power sources for hobby projects include:
- A standard 9V battery provides 9 volts.
- A USB port provides 5 volts.
- AA or AAA batteries provide 1.5 volts each.
If you use a microcontroller, its output pins will be your source voltage. For example, an Arduino Uno typically functions at 5V, while a Raspberry Pi operates at 3.3V for its GPIO pins.
⚠️ Important Tip: Be careful when mixing components. Sending a 5-volt signal from an Arduino to a Raspberry Pi's 3.3V GPIO pin can cause permanent damage. Always check your component's voltage requirements.
FINDING THE LED FORWARD VOLTAGE (VF)
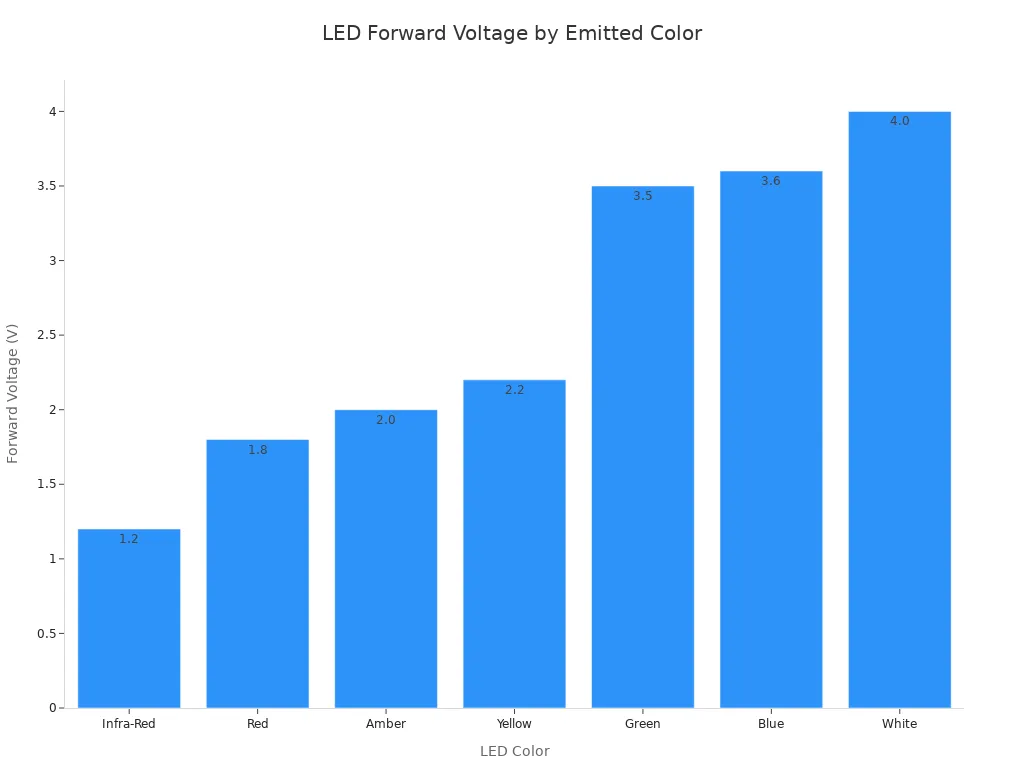
The LED forward voltage (Vf) is the amount of voltage the LED needs to turn on and emit light. This value is determined by the semiconductor material inside the LED, which also dictates its color.
The best place to find the exact forward voltage is the LED's datasheet. You can often find this information in a section with 'forward current vs. forward voltage graphs'.
If you do not have a datasheet, you can use a common estimate. Different colors of LED have different voltage requirements. For instance, a standard red LED might have a forward operating voltage of about 1.2V, while a blue LED could require around 3.6V.
Here is a quick reference table for common LEDs:
| LED Color | Forward Voltage (Vf) Range |
|---|---|
| Red | 1.9V – 2.1V |
| Yellow | 2.0V – 2.2V |
| Green | 2.2V – 3.0V |
| White | 3.0V – 3.5V |
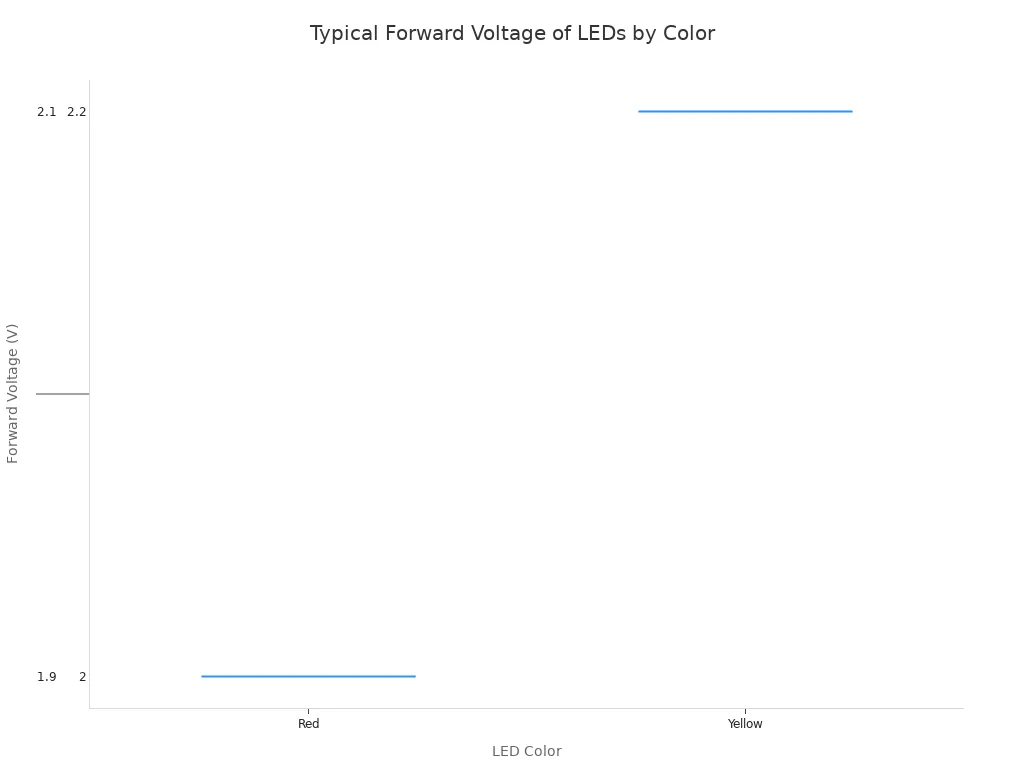
The specific semiconductor compounds like Gallium Arsenide (GaAs) or Gallium Indium Nitride (GaInN) determine the LED's color and its led voltage. This is why the led voltage varies so much between colors.
DETERMINING THE LED FORWARD CURRENT (IF)
The LED forward current (If) is the ideal amount of electrical current the LED is designed to handle continuously for optimal brightness and lifespan. This current requirement is crucial to calculate resistor value correctly.
Just like the forward voltage, the datasheet is the best source for this information. You will see two important values:
- Typical Forward Current: This is the recommended current for continuous, long-term use. An LED can handle this current without overheating. This is the number you should use to calculate the resistor value.
- Maximum Forward Current: This is a much higher current an LED can handle for very short pulses. Running an LED at this current continuously will destroy it.
Operating an LED at its maximum forward current is not recommended. Once the applied voltage goes past the forward voltage, the current can increase exponentially and burn out the LED instantly. A resistor is essential to limit the current and protect your LED.
For most standard 5mm or 3mm LEDs, a desired led current of 20 milliamperes (mA) is a safe and common choice. Remember to convert this to Amperes (A) for the formula by dividing by 1,000.
20 mA = 20 / 1000 = 0.020 A
Using these three values—Source Voltage, LED Forward Voltage, and LED Forward Current—you have everything you need to calculate resistor value and ensure your LED has a long, bright life.
A PRACTICAL CALCULATION EXAMPLE

Theory is great, but let's walk through a real-world example. This process will show you how to calculate the resistor value for a common project: lighting up a single red LED with a 9V battery.
GATHERING THE VALUES
First, you need to gather your three key numbers. Let's define them for our project.
- Source Voltage (Vs): You are using a standard 9V battery, so your Vs is 9V.
- LED Forward Voltage (Vf): You have a standard red LED. While datasheets are best, a common forward voltage for a red LED is about 2.0V.
- LED Forward Current (If): For most 5mm LEDs, a safe and bright current is 20 milliamperes (mA). You must convert this to Amperes for the formula: 20mA / 1000 = 0.020A. This is your desired led current.
APPLYING THE FORMULA
Now you can plug these values into our main formula to calculate resistor value.
Resistor (R) = (Source Voltage - LED Forward Voltage) / LED Forward Current
Let's do the math:
R = (9V - 2.0V) / 0.020A
R = 7V / 0.020A
R = 350 Ω (Ohms)
The calculation shows you need a 350 Ohm resistor. But there's one more important step.
CHOOSING A STANDARD RESISTOR VALUE
You probably won't find a 350 Ω resistor in a standard electronics kit. Resistors are manufactured in specific sets of values, known as the E-series (like E12 or E24). Your calculated resistor value will often fall between two standard values.
💡 Pro Tip: Always choose the next highest standard resistor value. This is the safest practice for beginners. A slightly higher resistance will reduce the current a little, protecting your LED and extending its life. A lower value could let too much current through and burn out the LED.
For our 350 Ω calculation, the next common standard resistor value is 390 Ω. This is the perfect choice for your circuit.
CONSIDERING THE POWER RATING
Finally, you must choose a resistor with the correct power rating. The resistor turns extra energy into heat, and it needs to handle that heat safely. You can calculate the power (in Watts) the resistor will dissipate.
Let's calculate the power for our example:
P = (9V - 2.0V) x 0.020A
P = 7V x 0.020A
P = 0.14 Watts
Common through-hole resistors come in ratings like 1/8W (0.125W), 1/4W (0.25W), and 1/2W (0.5W). Since our calculated power is 0.14W, a 1/8W resistor is too small and could overheat, discolor, or fail. The next standard size up is 1/4W, which is a safe and correct choice.
TOOLS AND TIPS FOR FINDING THE RESISTOR VALUE FOR LED LIGHTING
You have the formula and the theory. Now, let's explore some tools and tips that make your led lighting projects even easier. These resources help you work faster and understand the factors that can affect your calculations.
USING ONLINE RESISTOR CALCULATORS
If you want to find a resistor value quickly, online calculators are your best friend. These tools do the math for you. You simply enter your source voltage, LED forward voltage, and desired current. An Ohm's Law Calculator, for example, instantly applies the formula to solve for the resistance.
Many calculators offer advanced features for more complex led lighting setups. Some can even calculate the correct resistor for lighting leds in series or parallel.
For multiple LEDs in parallel, a calculator might use a formula like this to find the resistance:
R = (Source Voltage - LED Voltage) / (Number of LEDs × LED Current)
These tools are perfect for double-checking your work or tackling projects with multiple lighting leds.
WHY VALUES CAN VARY
Your calculated resistor value is an excellent guide, but real-world conditions can affect your led lighting. Temperature is a major factor. As an LED gets hotter, its forward voltage actually decreases. High temperatures also shorten an LED's lifespan. An increase of just 20°C can reduce its operational life significantly. This is why a good resistor is so important. It helps manage energy and heat, protecting the led from damage.
A QUICK SUMMARY OF THE PROCESS
Feeling confident? Here is a simple checklist to guide you every time you need to find the resistor value for led lighting.
- Find your source voltage (Vs). Check your battery, USB port, or microcontroller pin.
- Find the LED forward voltage (Vf). Use the datasheet or the reference table from earlier.
- Determine the LED forward current (If). A safe bet for most small LEDs is 20mA (0.020A).
- Calculate the voltage for the resistor. Subtract the LED voltage from the source voltage (
Vs - Vf). - Calculate the resistor value (R). Divide the resistor's voltage by the LED current (
R = V / I). - Choose the next highest standard resistor. This ensures your LED has a long and bright life.
You now know what does a resistor do and how to calculate the right one for your LED. Remember to find these three key values for your project:
- Your power supply's voltage.
- The LED's forward voltage, which is tied to its color.
- The ideal current for your LED.
With these numbers, you can use the fundamental formula to find the correct resistor.
Resistor (R) = (Source Voltage - LED Forward Voltage) / LED Forward Current
Always double-check your math. Choose the next highest standard resistor value to provide a dependable and consistent power supply. This simple step protects your LED components from stress and ensures a long, bright life.
FAQ
What happens if I use the wrong resistor?
A resistor with too little resistance lets too much current flow. This can burn out your LED instantly. A resistor with too much resistance makes your LED dim or prevents it from lighting up at all. Always double-check your calculation.
Can I use one resistor for multiple LEDs?
Yes, you can use one resistor for LEDs connected in series. You must add all the LED forward voltages together in your calculation. For LEDs in parallel, it is much safer to use one resistor for each LED.
Why must I round up to the next resistor value?
You round up to protect your LED. A slightly higher resistance reduces the current a little bit. This provides a safety margin and helps your LED last longer. Rounding down risks sending too much current to the LED.
Remember this simple rule: Rounding up dims the light slightly. Rounding down can burn it out completely.
Does it matter which way I connect the resistor?
No, most resistors are not polarized. You can connect them in either direction in your circuit. The LED, however, does have a direction. You must connect its long leg (anode) to the positive side of your circuit.