How to Choose the Right Terminal Connector for Your Project
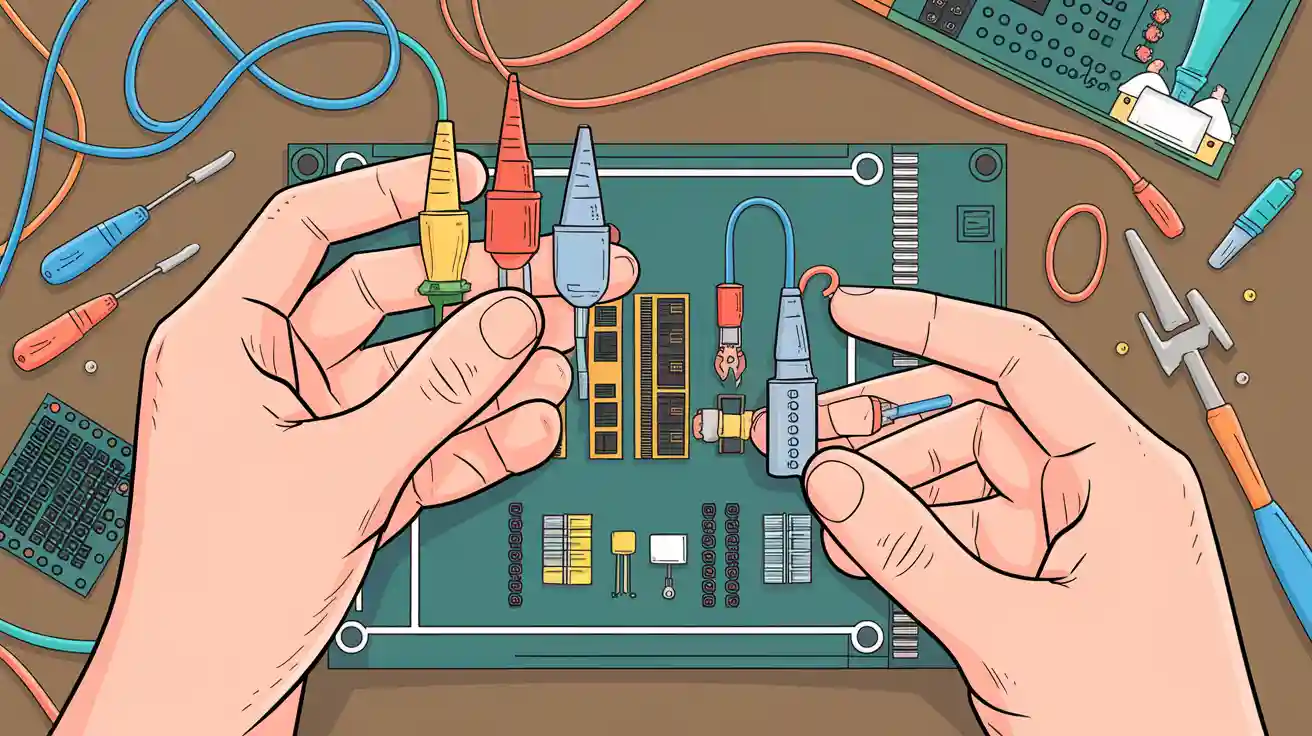
When you start an electrical project, you need to pick the right terminal connectors for your wires, your application, and your environment. Many connectors exist, each with a special job. You might see ring terminals for secure connections, disconnect terminals for easy changes, or fork terminals for tight spaces. Terminal blocks also come in many forms, such as screw, spring-clamp, or push-in styles. Choosing the right connectors keeps your project safe and reliable.
Key Takeaways
- Match terminal connectors to your project's voltage, current, and wire gauge to ensure safety and reliability.
- Choose connector types based on your environment and mechanical needs, like waterproof connectors for wet areas and ring terminals for vibration resistance.
- Select insulation materials that fit your project, using heat shrink for the best protection against moisture and corrosion.
- Use the right tools and follow proper installation steps, including correct wire stripping, crimping, and sealing with heat shrink.
- Avoid common mistakes by inspecting connections carefully and always matching terminal size to wire gauge for secure, long-lasting results.
Project Requirements
Voltage and Current
When you select terminal connectors, you must match them to your project's voltage and current needs. Start by checking the rated current and voltage for each connector. If you use a connector below the required rating, you risk overheating, arcing, or even fire. Follow these steps to make the right choice:
- Check the rated current. Always pick connectors with a rating at least 20% higher than your circuit's maximum current. For example, if your circuit draws 20 amps, choose a connector rated for at least 25 amps.
- Look at the voltage rating. The connector should handle your system's peak voltage, plus extra for surges. For household wiring, connectors rated for 600 volts are common.
- Consider insulation. High-voltage projects need connectors with strong insulation to prevent short circuits.
- Review material quality. Good contact materials and solid pin designs help manage heat and keep connections safe.
- Make sure your connector meets safety standards like UL, CSA, or IEC.
Tip: Pre-insulated terminals often come with clear voltage and current ratings printed on the packaging, making selection easier.
| Standard Type | Example Standard | Region / Origin | Description |
|---|---|---|---|
| Connector Specification Standards | DIN 41612 | Germany | Board-to-board connectors for industrial use |
| Safety Standards | UL, CSA | USA, Canada | Fire and insulation safety for connectors |
| Communication Standards | USB | International | Universal serial bus connector specs |
Wire Gauge
Wire gauge affects both safety and compatibility. You must match the connector size to your wire gauge. If you use a connector that is too large or too small, you risk loose connections and electrical hazards. Here is a quick guide:
| Wire Gauge (AWG) | Max Current (Amps) | Compatible Terminal Connector Sizes |
|---|---|---|
| 22 AWG | 5 A | Terminals sized #22 to #18 |
| 18 AWG | 10 A | Terminals sized #22 to #18 |
| 16 AWG | 13 A | Terminals sized #16 to #14 |
| 14 AWG | 17 A | Terminals sized #16 to #14 |
| 12 AWG | 23 A | Terminals sized #12 to #10 |
| 10 AWG | 33 A | Terminals sized #12 to #10 |
| 8 AWG | 46 A | Terminals sized #8 |
| 6 AWG | 65 A | Terminals sized #6 |
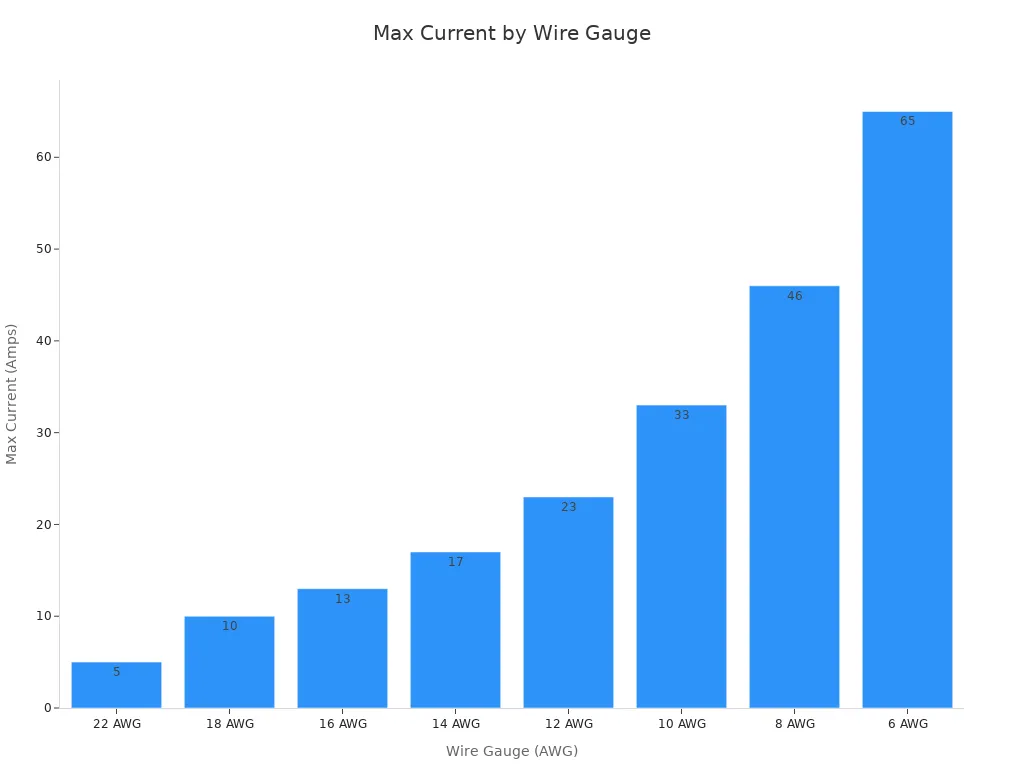
Pre-insulated terminals are available for most common wire gauges. Always check the packaging for compatibility before installation.
Environment
Your project's environment changes how you choose terminal connectors. Moisture, temperature, and vibration all affect connector performance. If you work in wet or humid areas, use waterproof connectors with high IP ratings like IP68. For high temperatures, pick connectors made from heat-resistant materials such as titanium or ceramic. In corrosive settings, 316 stainless steel connectors offer the best protection. Pre-insulated terminals with heat shrink covers add extra defense against water, dust, and chemicals.
Note: In marine or outdoor projects, pre-insulated terminals with waterproof seals help prevent corrosion and electrical failures.
Mechanical Needs
Mechanical stresses like vibration, pulling, and movement can loosen or damage connections. You should choose connectors with locking mechanisms or strain relief features. Ring connectors work best in high-vibration areas because their closed-loop design prevents accidental disconnection. Spade terminals and bullet connectors may loosen under vibration, so use them only in stable environments. Pre-insulated terminals with crimp flags and backshells provide extra strength and strain relief.
| Feature | Ring Connector | Spade Terminal | Bullet Connector |
|---|---|---|---|
| Resistance to vibration loosening | Excellent | Moderate | Poor |
| Mechanical lock strength | High | Medium | Weak |
| Risk of accidental disconnection | None | Possible | High |
Tip: Always use proper crimping tools and techniques to keep your pre-insulated terminals secure under mechanical stress.
Types of Terminal Connectors
Choosing the right terminal connectors starts with understanding the different electrical connector types available. You will see many options, each designed for specific tasks and environments. This section will help you recognize the most common types of connectors and how they work in your project.
Different Types of Wire Terminals
You will find several different types of wire terminals in electrical work. Each type connects wires to devices or other wires in a unique way. The most popular types of terminals include ring, spade (fork), pin, blade, and butt connectors.
Ring terminals have a metal ring with a hole in the center. You attach them by passing a screw or bolt through the ring. This creates a solid, vibration-resistant connection. You often use ring terminals in automotive wiring, industrial machines, and home appliances. They protect against heat, cold, dust, and corrosion, making them reliable for long-term use.
Spade terminals, also called fork terminals, have a U-shaped end. You can slide them under a screw without fully removing it. This makes installation and removal quick and easy. Spade terminals work well in general electrical connections where you need fast changes. They are less secure under vibration, so you should use them in stable environments.
Pin terminals have a straight metal pin. You insert the pin into a terminal block or connector. Pin terminals help connect wires to circuit boards or other connectors. They are useful when you need a simple, direct connection.
Insulated crimp connectors include a sleeve that covers the metal part. The color of the insulation shows the wire size it fits. This helps you match the connector to your wire gauge. Crimp connectors provide strain relief and keep connections secure.
Tip: Always match the terminal size and insulation to your wire gauge for safe and reliable connections.
Types of Connectors
You will encounter many different types of connectors in electrical projects. Each type serves a special purpose. Some connectors join wires together, while others connect wires to circuit boards or panels.
- Wire-to-wire connectors join two wires or cables. You use them in automotive wiring, consumer electronics, and industrial machinery. These connectors can be permanent or allow plugging and unplugging.
- Wire-to-board connectors connect a wire on one end to a socket on a printed circuit board (PCB). You use these connectors in commercial electronics, household appliances, and industrial equipment. They help transmit power and signals between wires and PCBs.
- Board-to-board connectors link two PCBs directly. You use them in compact systems like computers, medical instruments, and industrial automation. These connectors allow high-speed signal transmission and save space.
Other connector technology includes panel feedthrough connectors, which let large cables pass through panels or walls. You see these in factory automation and medical technology.
Specialty connectors offer extra features for tough environments. Weatherproof connectors resist water and dust. Underground connectors work below ground. Some specialty connectors handle high voltage, provide insulation piercing, or resist vibration. You use these in solar installations, industrial automation, and medical equipment.
Note: Specialty connectors often combine power and signal contacts in one body. This helps you meet complex needs in industrial and communication systems.
Types of Terminals
You will use different types of terminals depending on your project needs. Here are some common types of crimp connectors and their uses:
- Ring terminals: Secure connections for automotive, industrial, and home wiring.
- Spade terminals: Quick connect/disconnect for general electrical work.
- Pin terminals: Direct connections to terminal blocks or PCBs.
- Blade terminals: Flat metal blades for quick connections in appliances and vehicles.
- Butt connectors: Join two wires end-to-end for repairs or extensions.
- Lug terminals: Heavy-duty connections for large wires in power systems.
- Quick-connect terminals: Fast connections for switches and relays.
- Crimp connectors: Strong, permanent bonds for high and low voltage wiring.
- Twist-on connectors: Easy wire joining for home wiring, like light switches.
- Push-in connectors: Tool-free connections for multiple wires in junction boxes.
- Hooked blade terminals: Secure connections in tight spaces.
- Push-on connectors: Quick installation for automotive and appliance wiring.
- Specialty connectors: Designed for harsh environments, high voltage, or unique industry needs.
You will also find board-to-board connectors, wire-to-board connectors, and wire-to-wire connectors in many electronic and industrial systems.
Advantages and Disadvantages of Common Types of Crimp Connectors
| Connector Type | Advantages | Disadvantages |
|---|---|---|
| Push-In | Easy to use, no tools needed; quick installation; fits tight spaces | Not reusable; limited wire sizes; needs solid core wires |
| Crimp | Strong, long-lasting; resists vibration; fits many shapes and sizes | Needs a crimping tool; permanent connection; depends on user skill |
| Twist-On | Simple to install; reusable; good for home wiring | Not as strong as crimp; not for high vibration; limited wire sizes |
Tip: Use crimp connectors for strong, vibration-resistant connections in harsh environments. Push-in connectors work best for quick jobs in tight spaces.
Quick Reference Table
You can use the table below to match different types of connectors to their most common applications. This will help you choose the right connector technology for your project.
| Connector Type | Typical Applications | Advantages | Limitations |
|---|---|---|---|
| Ring Terminal | Automotive wiring, industrial machines, home appliances, electrical panels, DIY electronics | Vibration-resistant, secure, easy to install | Needs a stud or screw, not for quick changes |
| Spade Terminal | General electrical connections, quick removal needed | Fast connect/disconnect, easy to use | Less secure under vibration |
| Pin Terminal | Circuit boards, terminal blocks | Simple, direct connection | Limited mechanical strength |
| Blade Terminal | Appliances, vehicles, switches | Quick installation, compact | Can loosen under vibration |
| Butt Connector | Wire repairs, extensions | Joins wires end-to-end, insulated | Not for high vibration |
| Lug Terminal | Power systems, heavy-duty wiring | Handles large wires, strong | Needs proper crimping |
| Quick-Connect | Switches, relays, automotive | Fast installation, easy removal | May loosen over time |
| Crimp Connector | High/low voltage wiring, industrial, automotive | Durable, strong bond, low resistance | Needs crimping tool, permanent |
| Twist-On Connector | Home wiring, light switches, receptacles | Reusable, easy to install | Not for harsh environments |
| Push-In Connector | Junction boxes, home wiring | Tool-free, quick, compact | Not reusable, wire size limits |
| Board-to-Board | Motherboard-daughterboard, compact electronics, industrial automation | Saves space, high-speed signals | Needs precise alignment |
| Wire-to-Board | Commercial electronics, appliances, industrial equipment | Flexible wiring, power/signal transmission | Needs matching socket |
| Wire-to-Wire | Automotive, consumer electronics, industrial machinery | Permanent or plug/unplug options | May need housing for protection |
| Panel Feedthrough | Factory automation, process control, medical technology | Manages large cables, protects connections | Bulky, needs panel cutout |
| Specialty Connector | Solar, outdoor, underground, medical, data communications | Weatherproof, high voltage, vibration proof | Higher cost, special installation |
| Power Connector | Consumer electronics, industrial machinery, servers, laptops, power supplies, home appliances | Handles high current, safe | Needs certification, can be bulky |
| Signal Connector | Data communication, networking, audio/video, telecommunications, multimedia | Transmits signals, many shapes/sizes | Not for high current |
Note: Use board-to-board connectors for compact layouts and high-speed signals. Wire-to-board connectors help you connect flexible wiring to PCBs. Wire-to-wire connectors join cables in automotive and industrial systems.
Applications
Automotive
You work with many electrical systems in vehicles, from headlights to entertainment units. Blade connectors and bullet connectors fit well in tight spaces and provide strong connections for speakers and switches. Ring terminals give you a secure link for battery cables and grounding wires. Fork terminals help when you need to disconnect wires often, such as in speaker setups. Weather-proof connectors protect against moisture and dirt under the hood or near the wheels. You need connectors that resist shock, vibration, and temperature changes. Automotive wiring harnesses use terminals to join wires for engines, sensors, and controls. Battery connections rely on strong terminals to prevent rust and power loss. Lighting systems depend on terminals for steady power. Entertainment systems use terminals for smooth operation. You often use crimp terminals for repairs or upgrades, like adding extra lights or fixing loose wires.
| Connector Type | Key Features | Use Case Example |
|---|---|---|
| Blade Connector | Strong, easy to use, high power | Speaker wiring, switches |
| Bullet Connector | Compact, easy, low power | Car lights, tight spaces |
| Ring Terminal | Lasting, bolt/screw connection | Battery cables, grounding wires |
| Fork Terminal | Quick attach/remove | Speaker and switch connections |
| Weather-Proof | Water-resistant, sealed | Under-hood, near wheels |
Marine
You face special challenges in marine environments. Saltwater, vibration, and temperature extremes can damage connectors. You need waterproof connectors with high IP ratings, like IP67 or IP68, to keep water out. Epoxy-lined heat shrink tubing seals and protects against moisture, salt, and corrosion. Heavy-duty connectors with locking tabs stay secure even when the boat shakes. Color-coded connectors help prevent cross-connection mistakes. Strain relief features limit wire bending and flexing. You should choose connectors that meet ABYC standards for safety and reliability. Amphenol Sine Systems and Molex MX150 connectors work well in tight spaces and harsh conditions. AMP Superseal connectors separate pins to prevent short circuits.
Industrial
Industrial settings demand connectors that handle high voltage and current. Screw terminals work for both commercial and home wiring, supporting heavy wires. Spring-cage terminals resist vibration and allow frequent changes. Push-in terminals offer tool-free release and fit thin designs. Barrier terminal blocks provide isolation and prevent short circuits. DIN rail mounting keeps layouts neat and easy to identify. You need connectors that last and stay secure under vibration. Pin and socket connectors allow removable connections in harsh environments. Crimp terminals give you strong, durable links for machines and control systems. Remember, different applications require different solutions in industrial wiring.
Home Wiring
Home wiring projects use connectors that balance secure connections with easy installation. Ring terminals provide solid, permanent links at the stud. Fork terminals let you disconnect wires quickly without removing nuts. Butt splices join wires end-to-end for lasting repairs. Bullet connectors fit tight spaces and allow easy connection. Lugs handle larger wires for heavy-duty needs. Quick-connect terminals make semi-permanent connections without tools. Piggyback terminals let you connect multiple wires when tabs are limited. Spade terminals work like forks for quick attachment and removal. You should match the connector type to your specific application, since different applications require different solutions.
Materials and Insulation
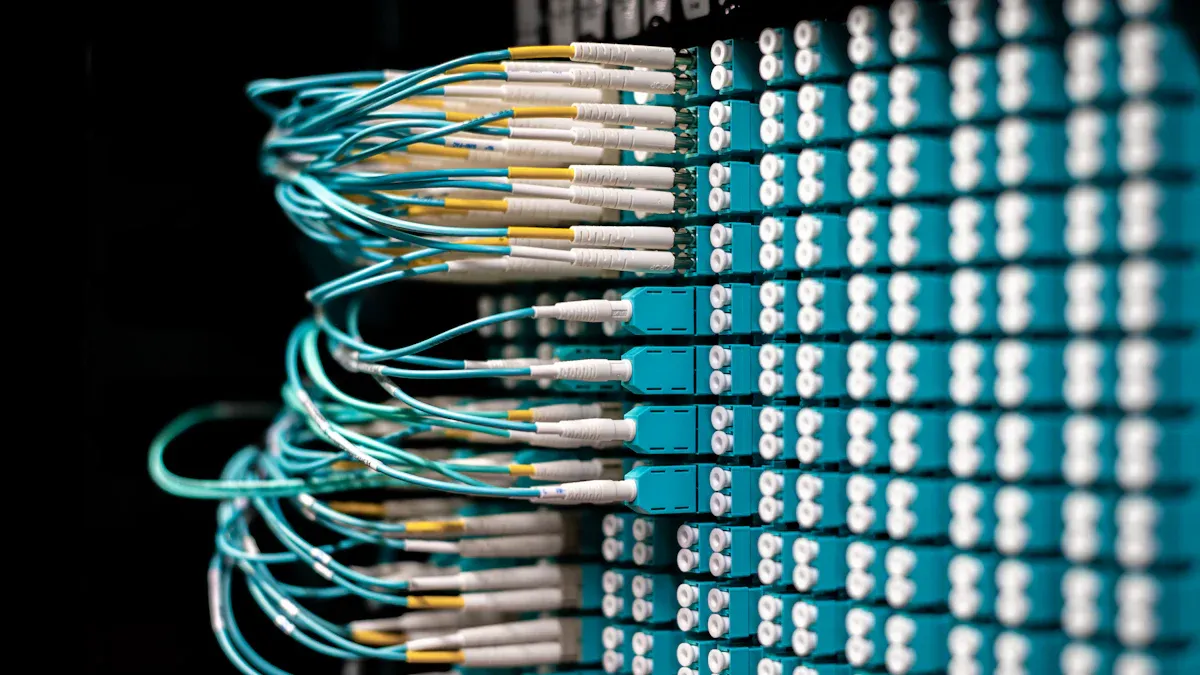
Choosing the right insulation for your terminal connectors helps you create safe and long-lasting electrical connections. You will find four main types: non insulated terminals, vinyl, nylon, and heat shrink. Each type works best in certain situations. You should match the insulation to your project’s needs, environment, and the level of protection you want.
Non-Insulated
Non insulated terminals have no covering. You see the bare metal, which makes it easy to inspect your crimp. These connectors cost less and work well when you use bootlace ferrules in dry, clean places. You should use non insulated terminals when you want to check your work quickly or when you use pre-insulated terminals elsewhere in the circuit. However, non insulated terminals do not seal out moisture or dirt. They can corrode or short out if exposed to water. You should avoid them in harsh or wet environments.
Tip: Use non insulated terminals with bootlace ferrules for easy inspection in indoor panels.
Vinyl
Vinyl insulation covers the metal part of the terminal. This type gives you basic protection against abrasion and impact. Vinyl pre-insulated terminals work well for home wiring, office setups, and light industrial jobs. You should use vinyl when you do not expect much moisture or oil. Vinyl does not seal the connection, so it does not protect against water or corrosion. If you need a sealed connection, look for other options.
Nylon
Nylon insulation feels more flexible than vinyl. It resists chemicals and does not crack easily. Nylon pre-insulated terminals help you in automotive, marine, and appliance wiring. You can see the crimp through the semi-clear nylon, which helps you check your work. Nylon does not seal the connection, but it lasts longer than vinyl in tough spots. You should use nylon when you want a bit more strength and chemical resistance.
Heat-Shrink
Heat shrink insulation gives you the best protection. You slide the heat shrink over the terminal, then use heat to shrink it tight. This creates a sealed connection that keeps out water, dust, and chemicals. Heat shrink crimp seal terminals and heat shrink solder seal terminals both use this method. You should use heat shrink in places with moisture, vibration, or harsh weather. Marine, automotive, and outdoor projects all benefit from heat shrink. Heat shrink crimp & solder seal terminals give you the strongest, most reliable sealed connection. Bootlace ferrules with heat shrink add extra strain relief and sealing. Pre-insulated terminals with heat shrink work well for repairs and upgrades in wet or dirty areas.
Note: Heat shrink crimp seal terminals and heat shrink solder seal terminals both create a sealed connection, but solder seal types also lower voltage drop and boost strength.
Here is a quick comparison:
| Terminal Type | Insulation | Sealing/Corrosion Resistance | Flexibility/Impact Resistance | Typical Use Cases |
|---|---|---|---|---|
| Non-Insulated | None | None | N/A | Bootlace ferrules, dry panels |
| Vinyl | Vinyl | None | Moderate | Home, office, light industry |
| Nylon | Nylon | None | High | Automotive, marine, appliances |
| Heat Shrink | Heat shrink tubing | Excellent (sealed connection) | High | Marine, automotive, outdoor, bootlace ferrules |
You should always choose pre-insulated terminals with the right insulation for your job. Bootlace ferrules with heat shrink give you a sealed connection and extra strain relief. Heat shrink crimp seal terminals, heat shrink solder seal terminals, and heat shrink crimp & solder seal terminals all protect your wires from water and corrosion. Use heat shrink when you need a sealed connection that lasts.
Remember: For the best sealed connection, use heat shrink crimp & solder seal terminals with bootlace ferrules and pre-insulated terminals in harsh environments.
Installation and Mistakes
Tools
You need the right tools to install terminal connectors safely. Start with wire cutters and strippers to remove insulation without damaging the copper strands. Use crimping tools that match your wire gauge and terminal type. Ratcheting crimping pliers help you create strong connections with pre-insulated terminals. Always select crimping dies that fit your connectors, especially when working with bootlace ferrules. If you use heat shrink, keep a heat gun nearby to seal the connection. For weatherproof jobs, choose terminals with built-in heat shrink or extra sealing features. Practice with scrap wire and pre-insulated terminals before working on important connections.
Essential Tools Checklist:
- Wire cutters and strippers
- Crimping tool with matching dies
- Ratcheting crimping pliers for pre-insulated terminals
- Heat gun for heat shrink
- Bootlace ferrules and accessories
Tip: Always inspect your crimped connection before sealing with heat shrink.
Installation Steps
Follow these steps to install crimp and push-in terminal connectors:
- Gather your materials: pre-insulated terminals, bootlace ferrules, copper wire, wire strippers, crimping tool, and heat shrink tubing.
- Strip ¼ to ½ inch of insulation from the wire. Avoid cutting copper strands.
- Slide bootlace ferrules or backshells over the wire if needed.
- Insert the bare wire fully into the terminal barrel or bootlace ferrules. Make sure no copper is exposed.
- Position the terminal in the crimping tool slot that matches the insulation color or barrel size.
- Squeeze the tool firmly to create a secure crimp. Use pre-insulated terminals for extra protection.
- Inspect the crimp by gently pulling the wire. If it feels loose, re-crimp.
- Slide heat shrink over the connection and use a heat gun to seal it. This step protects against moisture and vibration.
- For push-in connectors, insert the wire until it clicks. Check for a tight fit.
- Test the finished connection before installing it in your project.
Note: Using heat shrink and bootlace ferrules with pre-insulated terminals helps seal and protect your connections.
Common Errors
Many people make mistakes during installation. You can avoid these problems by following simple tips:
- Stripping too much or too little insulation causes weak connections. Always strip exactly ¼ inch for pre-insulated terminals and bootlace ferrules.
- Cutting heat shrink too short leaves gaps. Use extra length to seal the whole connection.
- Overheating heat shrink burns insulation. Hold the heat gun at the right distance to seal without damage.
- Loose screws or poor crimping lead to bad contact. Tighten screws and check crimps on pre-insulated terminals.
- Using the wrong terminal type or size causes poor fixation. Match bootlace ferrules and pre-insulated terminals to your wire gauge.
- Skipping inspection lets mistakes go unnoticed. Always check your work before sealing with heat shrink.
| Mistake | How to Avoid |
|---|---|
| Poor wire stripping | Strip exactly ¼ inch |
| Short heat shrink | Cut extra length for full seal |
| Overheated insulation | Use heat gun at safe distance |
| Loose crimp | Squeeze tool fully, inspect crimp |
| Wrong terminal size | Match wire gauge and terminal type |
Remember: Using bootlace ferrules, pre-insulated terminals, and heat shrink helps you seal and protect every connection.
You can choose the right terminal connector by following a clear process. First, assess your project’s voltage, current, wire gauge, and environment. Next, learn about connector types and match them to your application. Select materials and insulation that fit your needs. When installing, double-check each step:
- Verify ratings for voltage and current.
- Use the correct wire gauge and connector size.
- Inspect crimps and insulation for security.
- Regularly check for damage or corrosion.
Careful selection and inspection help you build safe, reliable connections every time.
FAQ
What is the difference between a crimp and a solder terminal?
A crimp terminal uses pressure to secure the wire. You use a crimping tool for this. A solder terminal uses melted metal to join the wire. Crimping works faster and resists vibration better.
How do I know which wire gauge matches my terminal connector?
You can check the packaging or use a wire gauge chart. Most pre-insulated terminals have color codes. Always match the wire size to the terminal size for a safe connection.
Can I reuse terminal connectors after removing them?
You should not reuse most crimp or push-in connectors. Removing them can weaken the metal. Always use a new connector for the best safety and reliability.
Why does my connection keep coming loose?
Loose connections often happen when you use the wrong size terminal or do not crimp tightly. Always use the correct tool and check your work. Vibration can also loosen some connectors.
Do I need special connectors for outdoor or wet locations?
Yes, you need waterproof or heat-shrink connectors for outdoor or wet areas. These connectors seal out water and prevent corrosion. Look for connectors with high IP ratings for the best protection.