A Simple Tutorial for Your First Arduino Nano Sketch
You have an Arduino Nano, and you are ready to make it work. This simple tutorial will guide you. You can create your first sketch without any coding experience. The Arduino platform is a great place to start your electronics journey.
You are joining a huge community of creators! The Arduino market is growing fast, showing how many people love using it.
| Metric | Value |
|---|---|
| Market Value (2023) | US$ 405.4 Million |
| Projected Market Value (2030) | US$ 655.3 Million |
| CAGR | 7.1% |
We will start by making an LED blink. This project is the classic "Hello, World!" for microcontrollers. It is the perfect first step with your Arduino.
Key Takeaways
- Install the Arduino IDE software. This program helps you write code and send it to your Arduino Nano board.
- Connect your Arduino Nano to your computer. Use a Mini-B USB cable for power and data. Install a CH340 driver if your computer does not see the board.
- Configure the IDE settings. Select 'Arduino Nano' as the board. Choose the correct processor and COM port for your board.
- Upload the 'Blink' example sketch. This code makes a small light on your board turn on and off. It is a classic first program for microcontrollers.
- Check the LED on your Arduino. It should blink on and off. This means you successfully programmed your Arduino Nano.
Get Started with Arduino Nano
Your first step to get started with Arduino Nano is setting up the software. You will need the Arduino Integrated Development Environment (IDE). This program lets you write code and send it to your board.
Install the Arduino IDE
You can download the official software from the Arduino website. The latest version is the Arduino IDE 2.3.6. Make sure your computer meets the minimum requirements before you install it.
| Operating System | Minimum Version |
|---|---|
| Windows | Win 10 or newer, 64-bit |
| macOS | Version 10.14 “Mojave” or newer, 64-bit |
| Linux | 64-bit |
After installation, you need to ensure the IDE can talk to your Arduino Nano. The software needs a package called "Arduino AVR Boards".
- Open the Arduino IDE.
- Go to Tools > Board > Boards Manager.
- Search for "Arduino AVR Boards".
- Confirm you have version 1.16.21 or later installed. The IDE usually includes this by default.
Connect the Board to Your Computer
Now you can connect your hardware. You need a Mini-B USB cable to link the Arduino Nano to your computer. This single cable provides both power and a data connection.
Plug one end of the cable into the board and the other into a USB port on your computer. You should see a small power light turn on.
Note: Some computers may not recognize your board right away. Many clone Arduino boards use a CH340 chip instead of the FTDI chip found on genuine boards. If your computer does not see the board, you may need to install a CH340 driver. A quick search for "CH340 driver" will give you the files and instructions you need.
With the software installed and the board connected, you are ready to configure the IDE. This is the final step before you can upload your first program to the Arduino. Let's get started with Arduino Nano and its configuration.
Configure the IDE for Your Arduino Nano
Your computer needs to know how to talk to the Arduino Nano. You will now configure the IDE to make this connection. These settings tell the software exactly what kind of hardware you are using.
Select the Board
First, you must tell the IDE that you are using an Arduino Nano. You can find the board selection options in the Tools menu.
- Go to Tools > Board > Arduino AVR Boards.
- Select Arduino Nano from the list.
You will see many other boards listed in the menu. The Arduino IDE supports a wide variety of hardware from companies like SparkFun and Adafruit, including:
- Adafruit Feather M0
- SparkFun RedBoard
- LilyPad Arduino USB
For now, just make sure you have selected the correct Arduino board for this tutorial.
Select the Processor
This is a very important step. Your choice depends on the age of your board. Newer boards use a different bootloader than older ones. A bootloader is a small program that runs on the microcontroller to manage uploads.
Go to Tools > Processor. You will see two main options:
ATmega328PATmega328P (Old Bootloader)
Start by selecting ATmega328P. If you try to upload your code later and it fails, come back to this step. The most common reason for an upload failure is selecting the wrong bootloader. Simply change this setting to ATmega328P (Old Bootloader) and try again.
Select the COM Port
Finally, you need to select the correct communication port. The COM port is the virtual doorway your computer uses to send code to the Arduino.
Go to Tools > Port. You should see at least one option listed, such as COM3 (on Windows) or /dev/cu.wchusbserial1410 (on macOS/Linux). To find the right one on Windows, you can open the Device Manager and look under the "Ports (COM & LPT)" section. Unplug and replug your board to see which port appears and disappears. That is the one you need to select.
If the Port menu is grayed out or you see an error like
Serial port not selected, it means your computer does not recognize the board. This is usually a driver issue. Make sure you have installed the CH340 driver if you have a clone board.
Upload Your First Sketch
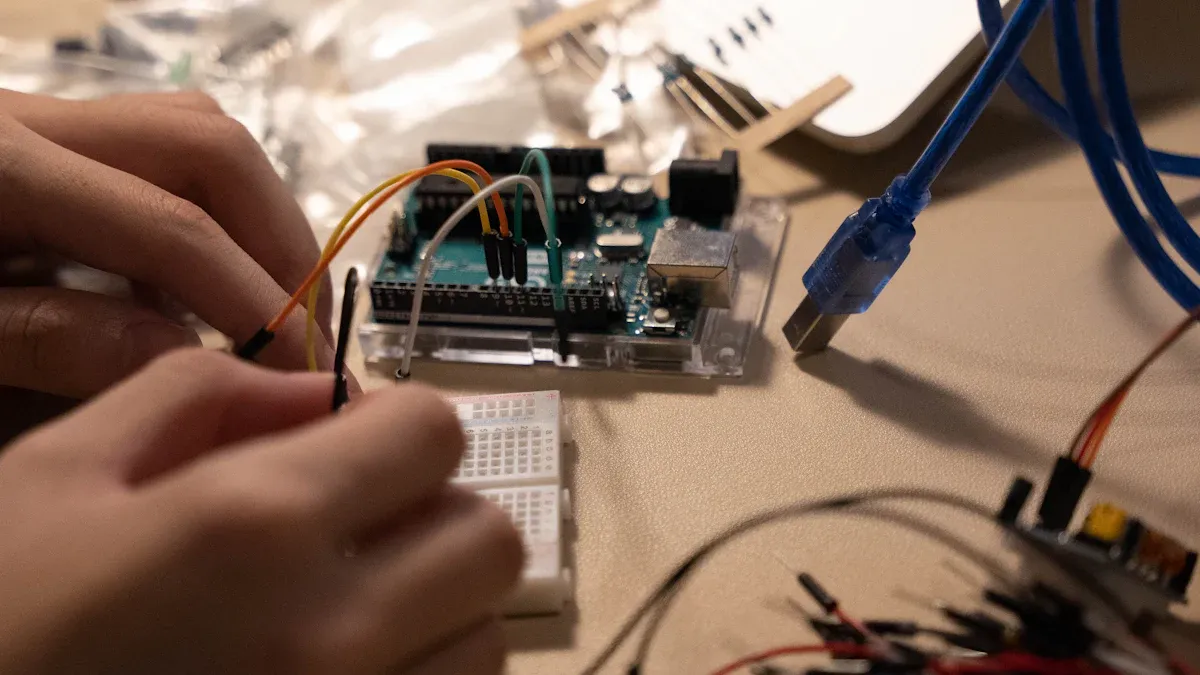
You have configured the IDE and connected your board. Now you are ready for the most exciting part. You will upload and run your first sketch. This program will make the small light on your board blink.
Open the Blink Example
The Arduino IDE includes many built-in examples. These are great for learning. You will start with the most famous one: Blink.
To open the Blink sketch, follow these steps in the IDE menu:
- Go to File
- Select Examples
- Choose 01.Basics
- Click Blink
A new window will appear with the code for your first sketch. Every Arduino program has two main parts: setup() and loop().
void setup(): This function runs only one time when your Arduino board first powers on. You use it to prepare your board. It is the ideal place to initialize input and output pins.void loop(): This function runs over and over again forever. Aftersetup()finishes, theloop()function starts. It contains the main logic of your program and continues until you power off the board.
Inside the setup() function, you will see this line:
// The pinMode() function takes two values, which you type in
// the parenthesis after the function name. The first value is
// a pin number, the second value is the word INPUT or OUTPUT.

// Here we'll set up pin 13 (the one connected to a LED) to be
// an output. We're doing this because we need to send voltage
// "out" of the Arduino to the LED.

pinMode(LED_BUILTIN, OUTPUT);
The pinMode() function tells the Arduino that a specific pin will be an output. In this case, it configures the pin connected to the built-in LED.
Inside the loop() function, you will see commands that turn the LED on and off. The digitalWrite() command sends voltage to the pin.
digitalWrite(LED_BUILTIN, HIGH)sends a HIGH signal (voltage) to the pin, which usually turns the LED on.digitalWrite(LED_BUILTIN, LOW)sends a LOW signal (no voltage) to the pin, turning the LED off.delay(1000)tells the Arduino to pause for 1000 milliseconds (1 second).
Verify and Compile the Code
Before sending the code to your board, you should check it for errors. This process is called verifying or compiling.
Click the Verify button at the top left of the IDE. It looks like a checkmark ✔️.
The IDE will check your code for programming issues like syntax mistakes. It ensures the code is set up correctly. If everything is okay, you will see a "Done compiling" message at the bottom.
Common Errors for Beginners ⚠️ If the IDE finds an error, it will show a message in the bottom console. The most common mistakes are simple typos.
- Missing Semicolons (;): Every command in Arduino C++ must end with a semicolon.
- Mismatched Brackets ({}): The
setup()andloop()functions must have an opening brace{and a closing brace}. A missing or extra brace often causes errors like"a function-definition is not allowed here before '{' token"or"expected '}' at end of input". Always make sure your brackets are paired correctly.
Upload to the Board
With your code verified, it is time to send it to your Arduino Nano.
Click the Upload button. It is right next to the Verify button and looks like an arrow pointing to the right ➡️.
The IDE will compile the code again and then upload it to your board. You may see the small TX and RX lights on your board flash rapidly during this process. Once finished, the IDE will display a "Done uploading" message.
Did the Upload Fail? Sometimes uploads do not work on the first try. If you see an error message, do not worry. Here are the most common solutions:
- Confirm you selected the correct COM port under Tools > Port.
- Try changing the processor. Go to Tools > Processor and select ATmega328P (Old Bootloader). This is a very common fix for clone boards.
- Make sure your USB cable is fully plugged in. Some cables are for charging only and do not transfer data.
- Temporarily disable your antivirus software, as it can sometimes interfere with the upload process.
Confirm the LED is Blinking
Look at your Arduino board. You should see a small surface-mount LED blinking—on for one second, then off for one second. Congratulations! You have successfully programmed your Arduino.
This built-in LED is a special feature that makes testing easy. On a standard Arduino Nano, this LED is internally connected to a specific pin, so you do not need any external wires.
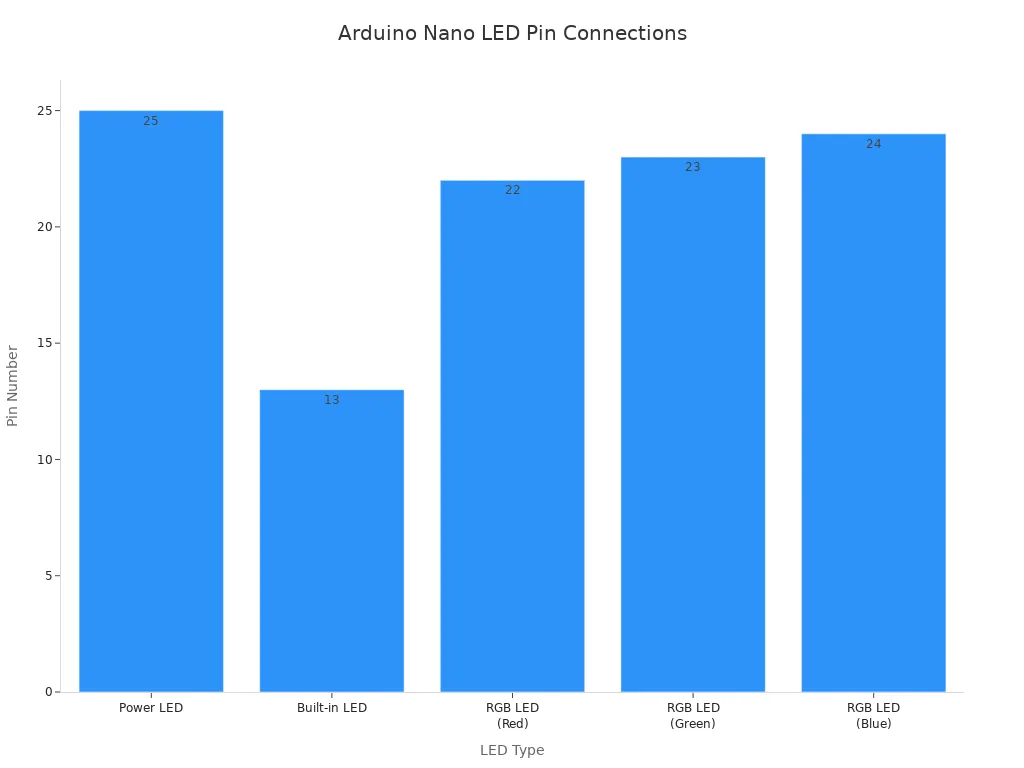
As the chart shows, the LED_BUILTIN variable in your code corresponds to digital pin 13. Your code is telling pin 13 to turn on and off, which makes the light blink.
Congratulations! You have completed this tutorial and made your first LED blink. You successfully programmed your Arduino. This is the most important first step on your journey. Now, you can experiment. Try changing the numbers in the delay() function to make the LED blink faster or slower.
For a bigger challenge, you can modify the code to use
millis()instead ofdelay(). This allows your Arduino to perform other tasks while waiting.
The IDE has many other examples for you to explore next. Try one of these:
- Analog Read Serial
- Bare Minimum
- Digital Read Serial
- Fading a LED
- Read Analog Voltage
FAQ
Why doesn't my computer see my Arduino Nano?
Your computer might need a specific driver. Many Nano clones use a CH340 chip instead of an FTDI chip. You can find and install the "CH340 driver" online. Also, confirm your USB cable can transfer data, not just provide power.
What is a bootloader?
A bootloader is a tiny program that lives on the Nano's microcontroller chip. It runs for a few seconds when you power on the board. This program listens for new code from your computer and manages the upload process.
How do I connect an external LED? 💡
You need an LED and a resistor (around 220 ohms is a good start).
- Connect the resistor to a digital pin (like pin 9).
- Connect the LED's long leg (anode) to the other end of the resistor.
- Connect the LED's short leg (cathode) to a
GNDpin.
Can I do other things while the LED is blinking?
The
delay()function pauses your entire program. Your Arduino cannot do anything else during that pause.
For more advanced projects, you should learn to use the millis() function. It lets you manage time without stopping your code, allowing the Arduino to perform multiple tasks.