A Beginner’s Guide to Multimeter Continuity Testing in 2025
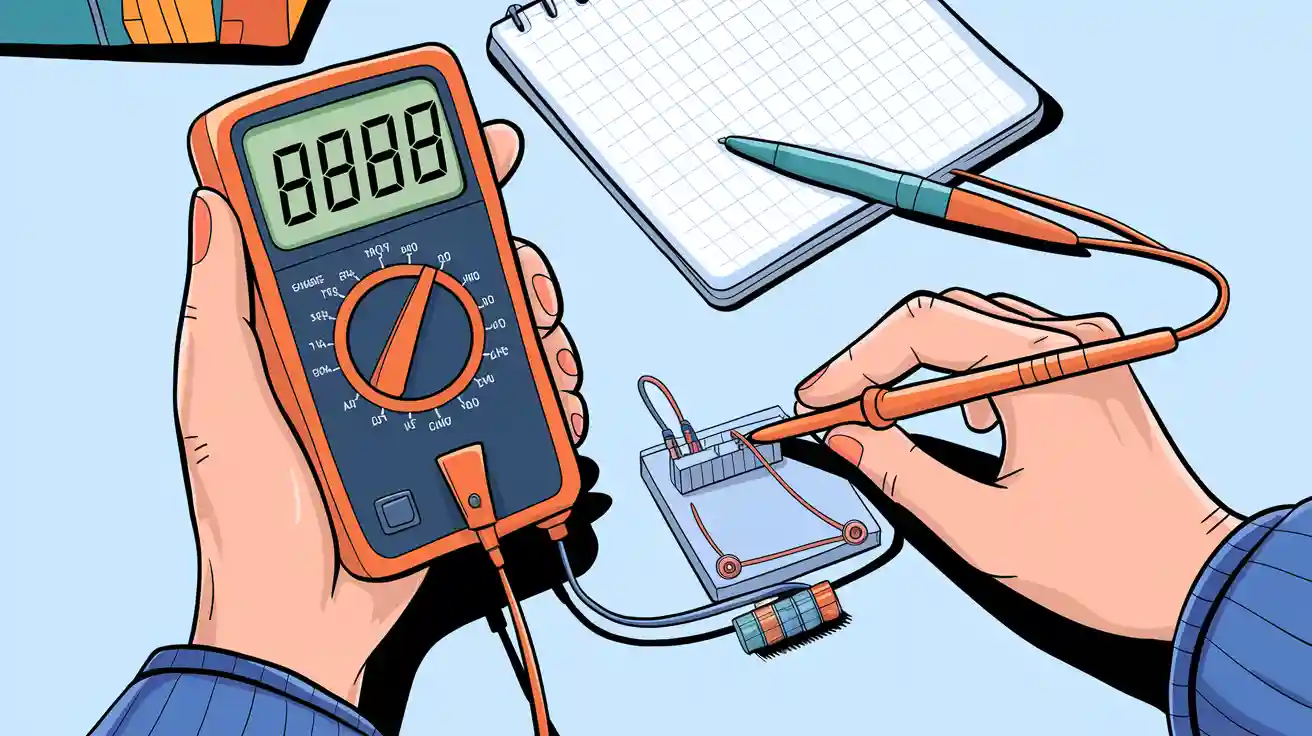
Continuity testing on a multimeter helps you check if a wire or circuit lets electricity flow from one end to the other. You do not need any special skills to start using a multimeter for this test. When you work with electricity, always think about your safety first. You should know what your test results mean before you move forward.
Key Takeaways
Always power off the circuit before testing continuity to stay safe and protect your multimeter.
Set your multimeter to continuity mode and connect the black lead to COM and red lead to VΩ for accurate results.
Listen for a beep or check for a low resistance reading to confirm a complete electrical path.
Inspect your test leads and probes for damage before each use to ensure safe and reliable testing.
Use continuity testing to quickly find broken wires, short circuits, and faulty connections in electronics.
Continuity Testing on a Multimeter
What Is Continuity?
When you use a multimeter, you can check if electricity flows through a wire or circuit without any breaks. This is called continuity. In simple terms, continuity means you have a complete path for current to travel. If the path is broken, electricity cannot flow. Industry standards say that continuity in electrical circuits is the existence of a complete and unbroken electrical path. You use a continuity tester or the continuity function on your multimeter to find out if a circuit is closed (complete) or open (broken).
The continuity function on a multimeter often makes a sound when the path is complete. This beep helps you know right away if the circuit works. You can use the continuity feature to test switches, wires, or other parts. If you hear a beep, you know the path is good. If you do not hear a beep, the path is broken.
Tip: Always use the continuity function with the power off. This keeps you safe and protects your multimeter.
Why Use Continuity Testing?
You use continuity testing on a multimeter to find problems in circuits and devices. The continuity function helps you check continuity in many parts of household electronics. Here are some common uses:
You can test resistors, capacitors, switches, wires, and electrical connections.
You can find open circuits caused by broken wires or loose parts.
You can detect short circuits that may damage your devices.
You can spot loose or corroded connections by checking for inconsistent readings.
You can test grounding points to make sure your device is safe.
The continuity function on a multimeter makes it easy for you to find faults quickly. You do not need to spend a lot of money. In 2025, you can buy a multimeter with a continuity tester for as little as $14. Most DIY users choose models in the $20-$30 range. Even basic models have the continuity feature, so you can start testing right away.
When you use the continuity function, you save time and avoid guesswork. You can fix problems faster and keep your electronics working well.
Preparation
Tools Needed
Before you start continuity testing, you need the right tools. Using the correct equipment helps you get accurate results and keeps you safe. Here is what you need for a successful test:
Choose a digital multimeter that supports continuity testing. Most modern models have this feature.
Connect the black test lead to the COM jack and the red test lead to the VΩ jack on your multimeter.
Set your digital multimeter to the lowest resistance range or the continuity mode. Look for a sound wave or diode symbol.
Make sure the circuit or component you want to test is powered off and isolated.
Place the test leads across the part you want to check.
Listen for a beep from your multimeter. This sound means you have continuity.
Use probes or clips for better contact and easier testing.
Always handle your digital multimeter and leads with care.
Tip: Inspect your multimeter probes before each use. Look for cracks, worn insulation, or loose connections. Clean the probes with a dry cloth. Replace damaged probes right away to keep your tests safe and accurate.
Safety Precautions
Safety is the most important part of using a multimeter. You must always power off the circuit before you test for continuity. Testing a live circuit can cause electric shock or damage your digital multimeter. Make sure all capacitors are fully discharged before you begin.
Never wear metallic jewelry when working with electrical equipment.
Know how to quickly turn off power in an emergency.
Do not disable safety interlocks on your multimeter.
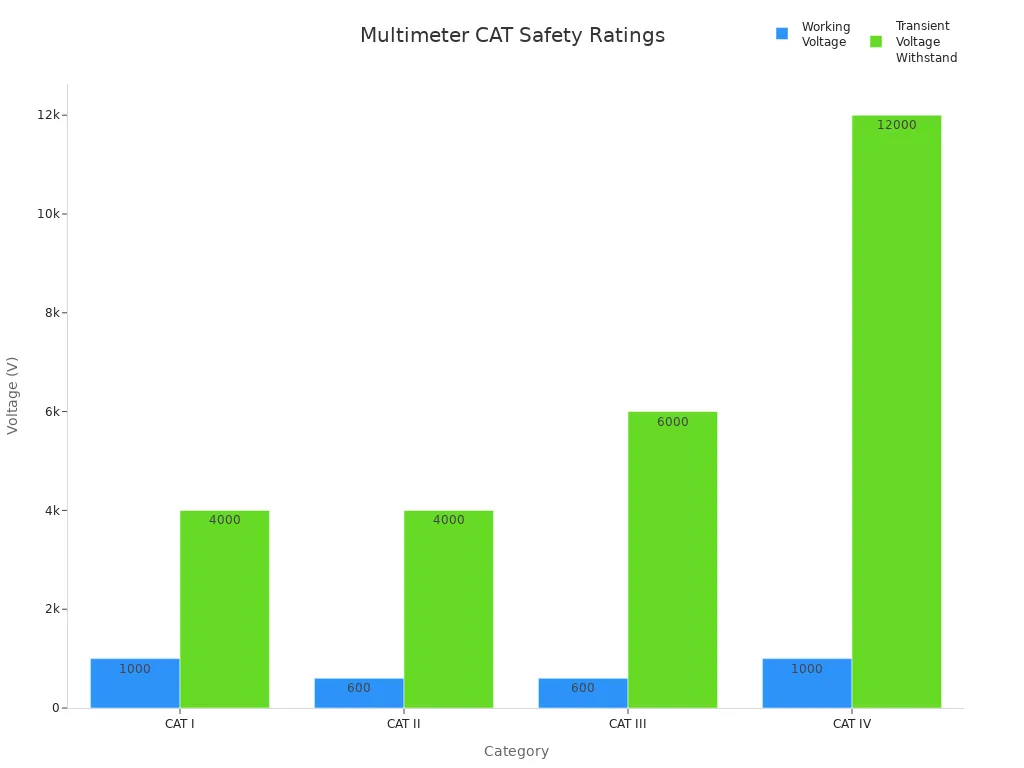
Use a multimeter with the right CAT safety rating for your environment. The table below shows the main categories:
Category | Intended Environment | Working Voltage Range | Transient Voltage Withstand |
|---|---|---|---|
CAT I | Electronic devices (low energy circuits) | Up to 1000 V | Up to 4000 V |
CAT II | Single-phase AC loads (appliances, portable tools) | Up to 600 V | Up to 4000 V |
CAT III | Three-phase distribution (building wiring, motors) | Varies (example: 600 V) | Example: 6000 V |
CAT IV | Utility connections, outdoor conductors | Up to 1000 V | Up to 12000 V |
You should always follow the manufacturer’s instructions for your digital multimeter. Store your multimeter and probes in a clean, dry place. Replace batteries often and calibrate your multimeter as recommended. These steps help you get safe and reliable results every time you use your digital multimeter.
How to Test for Continuity
Setting Up the Multimeter
You can start continuity testing on a multimeter by following a clear setup process. This helps you get accurate results and keeps you safe. Here is a step-by-step guide for setting up your digital multimeter for a continuity test:
Make sure the circuit or device you want to test is powered off. Unplug it or remove the batteries.
Insert the black test lead into the COM jack on your multimeter.
Insert the red test lead into the VΩ jack.
Turn the dial on your digital multimeter to the continuity mode. Look for a sound wave or diode symbol.
If your multimeter has a mode button, press it until you see the continuity test mode.
Touch the metal tips of the probes together. The multimeter should beep or show a very low resistance value. This step checks that your leads and meter work.
Inspect your test leads for any damage, such as frayed wires or loose connections. Replace them if needed.
Avoid placing the leads in current measurement ports when you measure continuity.
Tip: Always double-check that your multimeter is set to continuity mode before you begin. This prevents errors and protects your device.
Performing the Continuity Test
Once you have set up your digital multimeter, you can perform the continuity test. This process helps you find out if a circuit or component has a complete path for electricity.
Place the probes on the two points of the circuit or component you want to test for continuity. For example, touch each end of a wire or across a fuse.
Make sure you have firm and stable contact with the test points. This ensures you get an accurate reading.
Listen for a beep from your multimeter. Most digital multimeters use an audible beep to show a complete electrical path. Some models also have a visual indicator, like a light or a display reading.
If you do not hear a beep, check the display. A reading of "OL" (open loop) or a very high resistance means there is a break in continuity.
After you finish, turn off your digital multimeter to save battery life.
Note: The continuity function is a pass/fail test. It does not give you an exact resistance value but tells you if the path is complete.
Interpreting Results
Understanding the results of your continuity test is important. Your digital multimeter gives you both audible and visual signals.
If you hear a beep or see a low resistance value (usually less than 100 ohms), you have good continuity. This means electricity can flow through the path.
If you do not hear a beep and the display shows "OL" or a very high resistance, the circuit is open. This means there is a break in continuity.
Some multimeters also show a light or a digital reading close to zero when you measure continuity.
Here are typical results you might see:
Result | What It Means |
|---|---|
Beep or < 100 ohms | Good continuity (closed circuit) |
No beep, "OL" display | Open circuit (break in continuity) |
High resistance value | Poor or no continuity |
The exact resistance threshold for a beep depends on your multimeter model, but most use about 100 ohms as the cutoff.
A long wire may show about 1 ohm, which is still considered good continuity.
Tip: The continuity tester helps you quickly check wires, fuses, and connections. If you get no beep, try cleaning the probe tips or checking the leads.
Troubleshooting Common Issues
Sometimes, your continuity test does not work as expected. Here are some common problems and solutions:
If your multimeter does not beep when you touch the probes together, check that the leads are in the correct jacks (black in COM, red in VΩ).
Make sure the multimeter is set to continuity mode.
Inspect the test leads for damage. Replace them if needed.
Check the battery in your digital multimeter. Replace it if it is low or dead.
Clean the probe tips to ensure good contact.
If you still have problems, the fuse inside the multimeter may be blown. Replace it if necessary.
Test your multimeter on a known working circuit to confirm it is functioning.
Note: Never use the continuity function on a live circuit. This can damage your digital multimeter and give false readings.
By following these steps, you can use continuity testing on a multimeter to measure continuity in wires, fuses, and other components. The continuity test procedure is simple, but always remember to stay safe and double-check your setup. The continuity tester and continuity function make it easy to find faults and fix problems in your electronics.
Continuity Test Tips
Practical Advice
You can make your continuity test more effective by following a few simple tips. Always start by preparing your multimeter and workspace. Place your multimeter on a stable surface and keep your test leads organized. Before you begin, inspect the wires and connectors for any visible damage. Clean the probe tips to ensure good contact during the continuity test.
When you test automotive wiring, connect the harness to a test table or connector block. This setup helps you organize your continuity test and makes it easier to spot problems. Use your multimeter set to continuity mode and apply the probes to each wire or connector. The multimeter will beep or show a low resistance if the path is complete. For a thorough continuity test, check each pin and connector. This method helps you find open circuits or faulty electrical connections.
If you need to test for short circuits, use your multimeter to check between wires that should not connect. A beep during the continuity test means a short exists. You can also use the continuity test to check fuses, solder joints, and switches. Always make sure your multimeter gives both visual and audible feedback for fast troubleshooting.
Tip: Take notes during your continuity test. Write down which wires or components pass or fail. This habit helps you track your progress and find faults faster.
Common Mistakes
Many beginners make similar errors during a continuity test. You can avoid these mistakes by following a checklist:
Always connect the black lead to the COM port and the red lead to the VΩ port on your multimeter.
Inspect your test leads for frayed wires or loose connections before starting the continuity test.
Make firm contact with the test points. Loose contact can cause false readings during the continuity test.
Double-check your multimeter settings. Set it to continuity mode before you begin the continuity test.
Never perform a continuity test on a live circuit. Power off the device to protect yourself and your multimeter.
Trace the schematic lines before you start the continuity test. This step helps you know where to place the probes.
Do not skip testing all points. A complete continuity test finds both open and short circuits.
Mistake | How to Avoid |
|---|---|
Always power off before testing | |
Wrong lead placement | Check ports before each continuity test |
Poor probe contact | Hold probes firmly on test points |
Skipping visual inspection | Look for damage before testing |
Ignoring multimeter settings | Set to continuity mode every time |
Remember, a careful continuity test with your multimeter helps you find problems in electrical connections quickly and safely.
You can perform a safe and accurate continuity test by following these steps:
Connect the test leads to the correct ports on your multimeter.
Verify your multimeter by touching the probes together.
Place the probes on the points you want to check and listen for a beep.
Practicing the continuity test with your multimeter builds your confidence and helps you troubleshoot electrical problems quickly. Mastering this skill saves time and increases safety in every DIY project.
FAQ
How do you know if your multimeter is working before a continuity test?
Touch the two probes together. Your multimeter should beep or show a low resistance value. This step checks that your device and leads work correctly.
Can you use a multimeter to test for conductivity in water?
You can use a multimeter to test for conductivity in water by placing the probes in the liquid. If you see a low resistance reading, the water conducts electricity. Always use caution and keep your hands dry.
What does "OL" mean on your multimeter during a continuity test?
"OL" stands for "open loop." This means the circuit is open, and electricity cannot flow. You should check for breaks or loose connections.
Why should you never test continuity on a live circuit?
Testing a live circuit can damage your multimeter and cause electric shock. Always turn off the power before you start any continuity test.
What should you do if your multimeter does not beep during a continuity test?
Check the probe connections and settings. Make sure you set the multimeter to continuity mode. Inspect the leads for damage and replace them if needed.